You found a VRM file somewhere, or someone told you to “just use VRM.” But you have no idea what that means, and you definitely have not made an animation before.
That is fine. This guide starts from zero.
What Is a VRM File?
A VRM file is a 3D character file. Think of it as a container that holds a character’s appearance, body proportions, and movement settings, all in one place.
The format was originally built for virtual avatars (VTubers, VRChat, virtual meetings), but it has become a common starting point for animation as well. If you have a .vrm file, you have a character ready to move.
Where Do You Get a VRM File?
You have two options depending on whether you have your own character or not.
Option A: Make one with VRoid Studio (free)
VRoid Studio is a free character creation app by Pixiv. You pick a face, hair, outfit, and body type using sliders, no drawing skill needed. When you are done, you export the character as a .vrm file.
Download VRoid Studio: vroid.com/en/studio
The export process takes about two clicks. Go to Camera/Exporter, select Export, and save the file to your desktop.
Option B: Download a free VRM model
Several platforms distribute free VRM models made by other creators:
- VRoid Hub — the largest library, many models are free to use for personal projects
- Booth.pm — search “VRM free” for community-made characters
Check the usage terms on each model before you use it. Most free models allow personal and creative use.
How to Upload Your VRM to CineV
Once you have a .vrm file, the next step is getting it into CineV.
First, create a free account at cinev.com. New accounts receive 1,500 credits automatically. No credit card required.
Step 1. Go to “My Character”

After logging in, open the My Character section from the left sidebar. This is where CineV stores all your character files.
Step 2. Upload your VRM file

Click Add Character, then select Upload VRM. CineV reads the VRM data and builds a preview of your character. This usually takes under a minute.
If your character looks different from what you expected, check the VRM Character Upload Guide in the help center for common fixes.
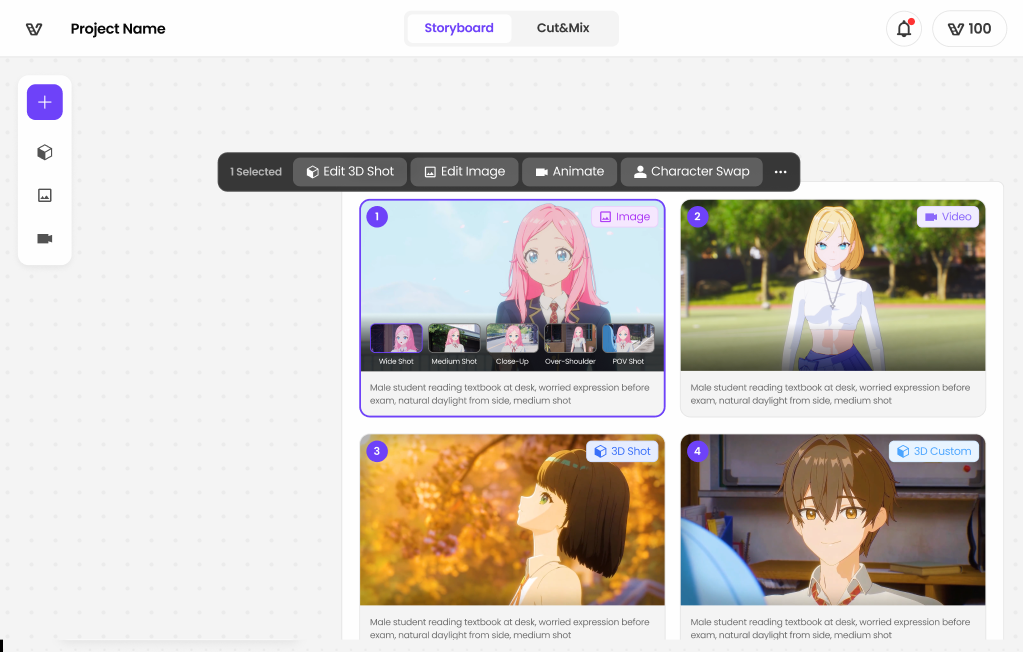
Step 3. Set your character as the protagonist

Once the upload is complete, open a new project and assign your character to the Character slot. You can see this Character Swap in your each project.
From here, you can choose camera angles, set a background, and pick a motion.
Making Your First Scene
You do not need to know animation to get a result here.
In CineV, you start by entering a simple story or scene description. You can choose a location yourself, or let the AI decide. The CineV Storyboard Builder reads your story or prompt and selects appropriate locations and motions to build the first scene. If you want to adjust, open Edit in 3D to change motions directly, or click on a location and object to add local motion.
Your first clip will use a small number of credits from your 1,500 starting balance. A short scene (a few seconds) costs a fraction of that, so you have room to experiment before spending anything.
Start with 1,500 free credits. No credit card needed. → Create your free account
Try It With Your Own Character for free
Free credits are included when you sign up. No payment required to get your first scene running.